I imported photos from my iPhone to my computer, but now I’m not sure how to safely delete the already imported pictures from my iPhone without losing anything. I need help figuring out the easiest way to remove duplicate storage and make sure the photos are backed up first.
I ran into this on my own iPhone, and it was one of those jobs that should have been easy but turned into a mess fast. You copy your photos to a computer, think you’re done, then the phone still throws the storage warning in your face. No clear remove-after-copy option, no clean flow, lots of second guessing.
The first thing I learned, the hard way, was the backup versus sync problem. If iCloud Photos is on, your iPhone is not acting like a separate photo bucket. It is tied to iCloud and your other Apple devices. Delete a photo on the phone, and you are often deleting it everywhere. So before you start wiping stuff from the device, make sure your pictures are stored somewhere outside the sync loop, like a regular folder on your Mac or PC. Or turn off iCloud Photos first, then clean house.
On Mac, Apple pushes you toward the Photos app. Plug the phone in with USB, import your shots, then look for the checkbox in the top right that says 'Delete items after import.' Mine disappeared more than once. From what I saw, iCloud Photos being enabled was usually the reason. When Photos got stubborn, I switched to Image Capture. It’s already on the Mac. Open Applications, launch Image Capture, pick your iPhone under Devices, and you’ll get a plain list of your photos and videos. Select what you already copied over, then hit the red delete icon. It felt less fussy, more direct.
Windows was a different flavor of annoying, though simpler on paper. I plugged the iPhone in, opened This PC, went into the iPhone storage, then DCIM. From there I deleted files like normal. When Windows threw the usual 'device is busy' or 'device unreachable' error, I had to change one setting on the iPhone. Go into camera transfer settings and switch 'Transfer to Mac or PC' to 'Keep Originals.' After I did that, file access stopped breaking as much.
If you want to sort it out on the phone itself, check the 'Imports' album in Photos. It’s under Albums, down near Utilities. I missed it the first time. That album groups media brought onto the device, so bulk selecting is easier there. One catch, and this tripped me up, deleting from there does not free space right away. iOS moves it into 'Recently Deleted' for 30 days. If your storage is already choking, open that folder too and remove everything again.
My reason for digging into all this was simple. My iPhone 13 got slow enough to feel broken. Typing lagged. The camera took a beat too long. Apps hesitated. Once free space dropped low, the whole phone felt off. I had around a gig left, maybe less, and iOS did not hide its irritation.
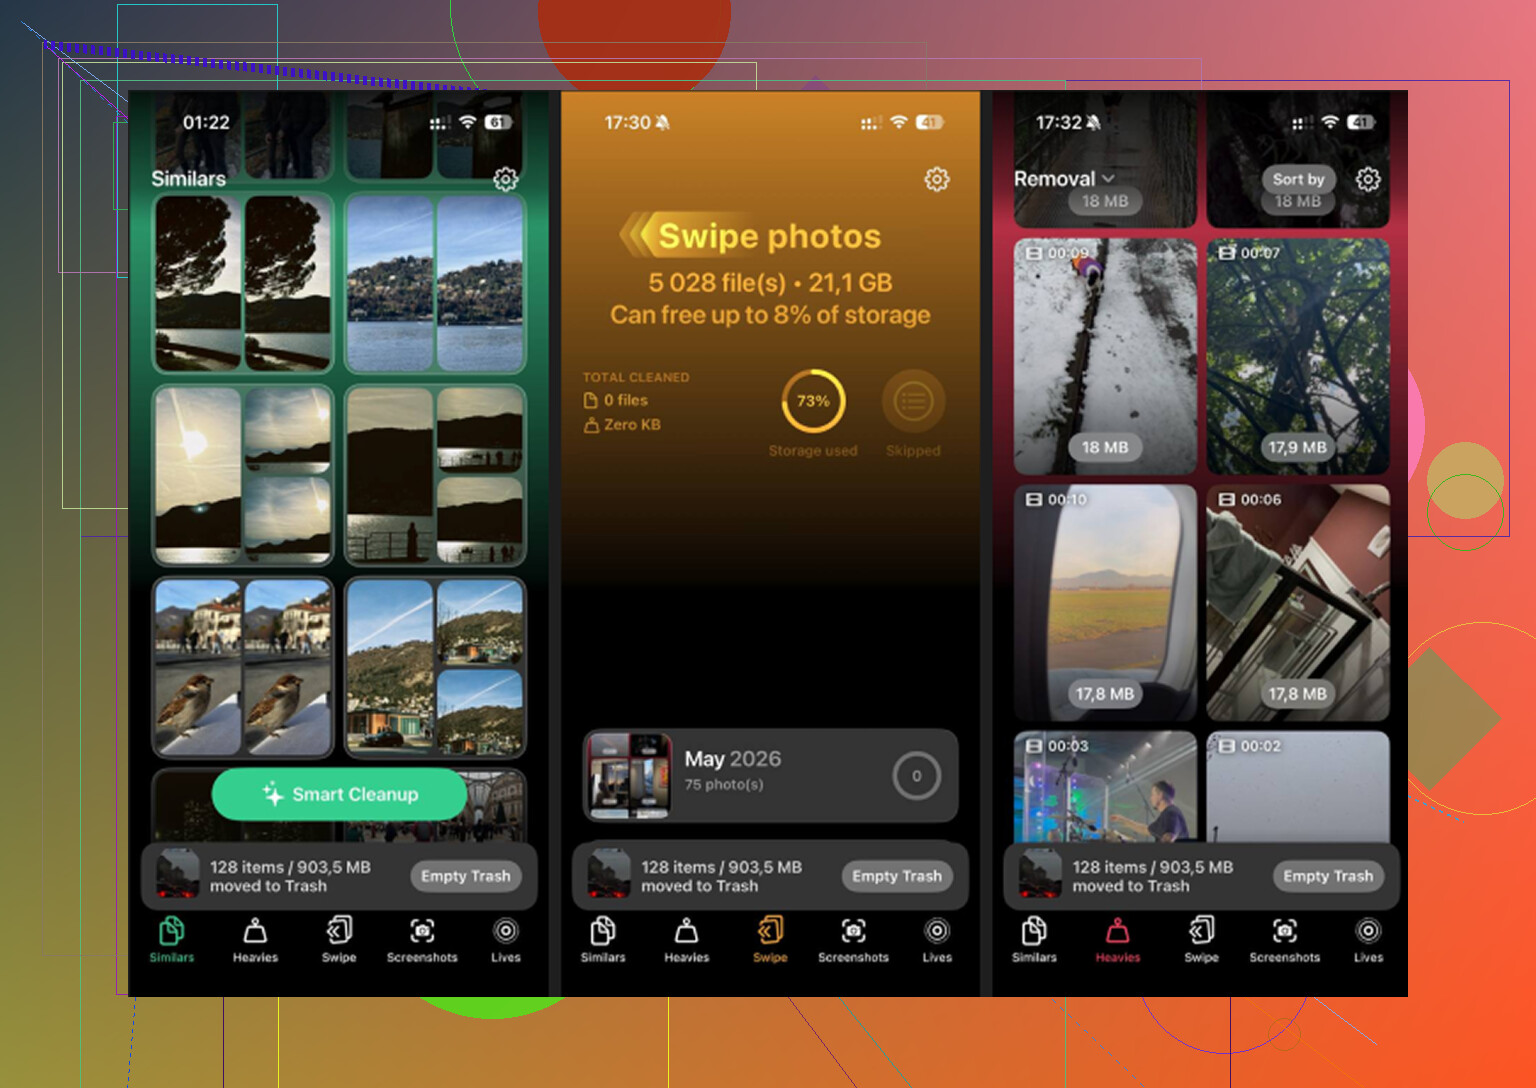
After the manual transfer, I still had piles of junk. Near-duplicate photos. Old screenshots. Random clips I forgot existed. I used Clever Cleaner for the second pass because doing it by hand was getting old. What stood out to me was the file size sorting. The 'Heavies' section made it easy to spot giant videos first, which mattered more than deleting fifty tiny screenshots. The 'Similars' section also helped with those photo bursts where nine shots are bad and one is worth keeping.
I liked one other part. It handled the scan on the device, so my photo library was not being shipped off somewhere else. I cleared around 15 GB after using it, and my phone stopped dragging. Not a subtle difference either. It felt normal again.
If your goal is to free storage after importing photos, I’d do it in this order.
1. Check whether iCloud Photos is on.
2. Move your photos into a regular non-syncing folder on your computer, if needed.
3. On Mac, try Photos first, then Image Capture if the delete option is gone.
4. On Windows, delete through DCIM, and switch to 'Keep Originals' if the phone keeps disconnecting.
5. On iPhone, use the Imports album for bulk cleanup.
6. Empty 'Recently Deleted' or the space will not come back yet.
That last step is the one people skip. I did too, first time. The photos looked gone, but the storage number barely moved. Once I cleared 'Recently Deleted,' the free space showed up a minute later.
Start with a spot check. Open the imported folder on your computer and make sure the files open fine. Check photo count, file dates, and a couple of videos. If you imported 2,000 items, don’t trust the transfer blind.
I differ a bit from @mikeappsreviewer on one point. I would not mass-delete from DCIM first unless you already verified the copy twice. Windows Explorer with iPhone stuff is flaky as hell.
Safer route:
- Make a second copy of the imported folder, external drive or cloud.
- On your iPhone, sort Photos by oldest or use search by month.
- Delete in small batches, like 100 to 300 at a time.
- Check iPhone storage after each batch.
- Empty Recently Deleted.
If your goal is duplicate cleanup too, use Clever Cleaner before deleting random stuff. It’s good for finding similar shots, big videos, and junk screenshots. This review covers the app well: see how Clever Cleaner helps clean iPhone photos for free
Small batches matter. iPhones sometimes freeze up or fail mid-delete. Learned this the annoyng way.
I’d actually start one step earlier than @mikeappsreviewer and @himmelsjager: verify the import with a few random full-size files, especially videos. Not just thumbnails opening, but actual files copied correctly. iPhone transfers can look “done” when they kinda aren’t.
My safest method was this:
- make one extra backup of the imported folder
- on the iPhone, create a temporary album called “To Delete”
- add only the photos you know are already on the computer
- review that album once
- delete from there
- then clear Recently Deleted
Why I like this better: it gives you one last visual checkpoint before nuking stuff. Less efficient, sure, but way less panic-inducing.
Also, if your main issue is duplicates and storage bloat after import, Clever Cleaner is honestly useful for the cleanup pass. Not for the initial backup, but for finding similars, giant videos, and leftover junk fast. That’s where it saves time.
If you want more real-world feedback, this thread has Reddit users sharing how Clever Cleaner helps free up iPhone storage.
One more thing people miss: if the photos were synced to the phone from a computer originally, you usually can’t delete them normally on-device. That trips up a lotta people.

I’d skip deleting through Windows DCIM unless you absolutely have to. @himmelsjager and @cazadordeestrellas covered the cautious angle well, and @mikeappsreviewer nailed the verify-first part, but my take is this: the least stressful method is deleting from the iPhone itself after you confirm the computer copy is good.
My order would be:
- Confirm imported photos are in a normal folder on your computer, not just inside a syncing app.
- Pick one month on the iPhone, not your whole library.
- Delete that month from Photos on the iPhone.
- Wait a minute and check whether storage actually changes.
- Empty Recently Deleted.
- Only then move to the next month.
Why month-by-month? Easier to notice if something is missing. Huge bulk deletes are where regret starts.
If duplicates are part of the mess, Clever Cleaner is useful after the backup, not before. Pros: quick duplicate detection, finds big videos, simple interface, free. Cons: you still need to review results, “similar” is not always “safe to delete,” and it won’t replace a real backup. So yes, helpful tool, not magic.