I’m having trouble getting my USB device to connect to my VirtualBox VM. I’ve tried numerous settings but still no luck. Can someone guide me on how to properly set this up?
Alright, here’s how you can passthrough a USB device in VirtualBox. I’ve had my fair share of headaches over this too, but once you get the hang of it, it’s not too bad. Follow these steps:
-
Install VirtualBox Extension Pack: Ensure you’ve installed the VirtualBox Extension Pack that matches your VirtualBox version. This is crucial because it adds support for USB 2.0 and USB 3.0 devices.
-
Enable USB Controller: In your VirtualBox Manager:
- Click on your virtual machine (but don’t start it yet).
- Go to the Settings option.
- Navigate to the USB section.
- Check the box next to ‘Enable USB Controller.’
- Select either USB 2.0 or USB 3.0 (I’ve had better luck with USB 2.0 for older devices).
-
Add your USB Device:
- Click on the small USB+ icon on the right side.
- Select your USB device from the list.
- This adds it to the list of available USB devices for your VM.
-
Start the VM: Now start your virtual machine.
-
Device Capture: If the USB device doesn’t automatically connect, go to Devices → USB and select your device from the list. Sometimes, you’ll have to do this manually because it’s a bit finicky.
-
Check Permissions: Make sure your user has the necessary permissions to use USB devices. On Linux, you’ll often have to add yourself to the
vboxusersgroup:sudo usermod -aG vboxusers $USER
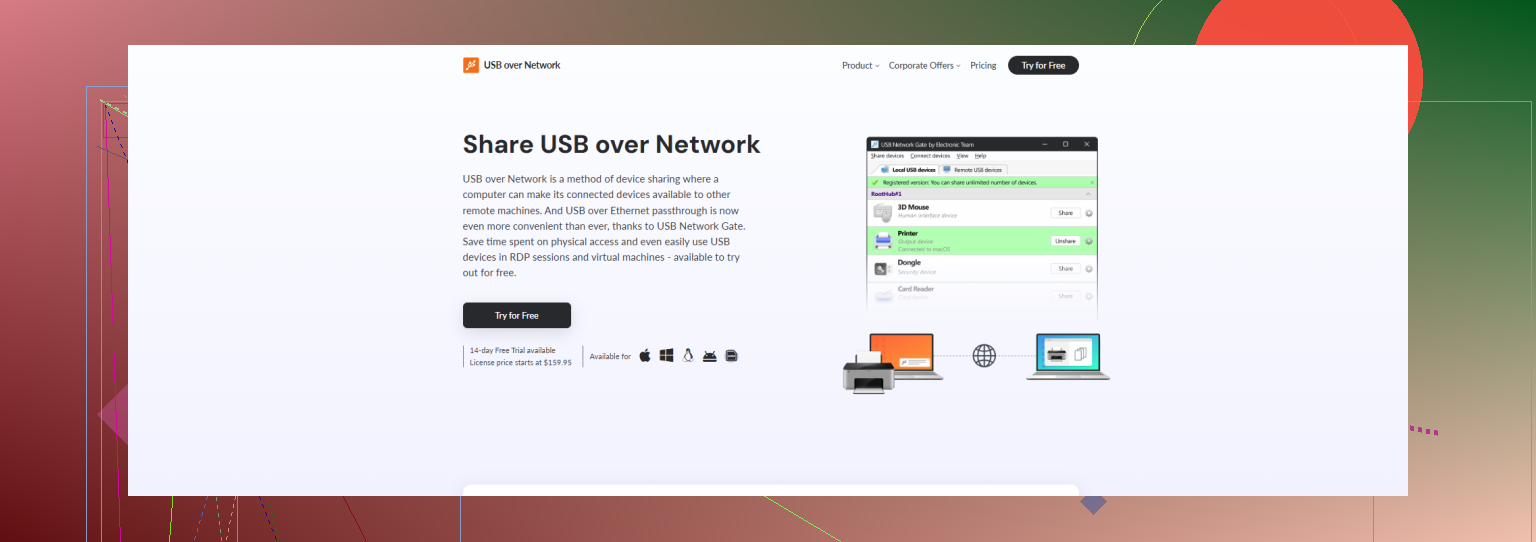
If you still can’t get it working, there could be other factors at play. And maybe it is better to consider using a tool like USB Network Gate. It’s a nifty tool that can help share USB devices over a network, which might bypass some VirtualBox quirks.
. I’d highly recommend checking out this simple VirtualBox USB passthrough video for more visual guidance.
Hope this saves you some of the frustration I went through!
Alright, let’s dive into a few extra tweaks that might help you with passing through USB devices in VirtualBox. Few More Helpful Tips:
1. BIOS/UEFI Settings:
Make sure that virtualization technology (VT-x/AMD-V) is enabled in your BIOS/UEFI settings. Surprisingly, this can sometimes affect USB passthrough performance.
2. Different USB Ports:
Try using different USB ports on your host machine. Ports have different behaviors, especially USB 3.0 vs. USB 2.0.
3. Check Device Compatibility:
Ensure the USB device itself is fully compatible with VirtualBox. Some devices just don’t play nice with VMs due to driver issues or firmware quirks.
4. Third-Party Software:
If all else fails, you can consider using software like USB Network Gate which lets you share USB devices over the network. This means your VM can connect to USB devices as if they were locally attached, sidestepping some of VirtualBox’s limitations.
Pros:
- Bypasses many of the issues that native VirtualBox USB passthrough has.
- Can be used over a network, enhancing flexibility.
- User-friendly interface.
Cons:
- It’s a paid solution, but it is free to use 1 device, which is enough for personal use.
- Adds an extra layer of software, which could potentially introduce its own set of issues.
Remember, while USB Network Gate is reliable, its competitors like FlexiHub also offer similar functions, so you might want to check them out too.
USB issues with VirtualBox can be frustrating, but with a little patience and these steps, you should be able to get it working. Good luck!